Articles
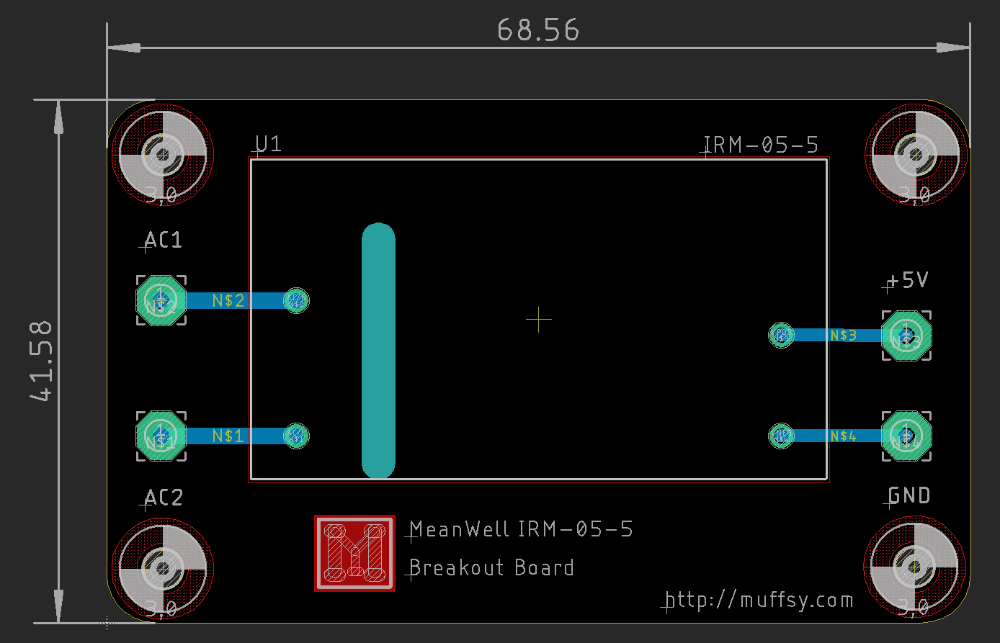
A very simple, but useful PCB. A power supply for the Muffsy Relay Input Selector (or anything else that can be powered by 5V DC/1A):
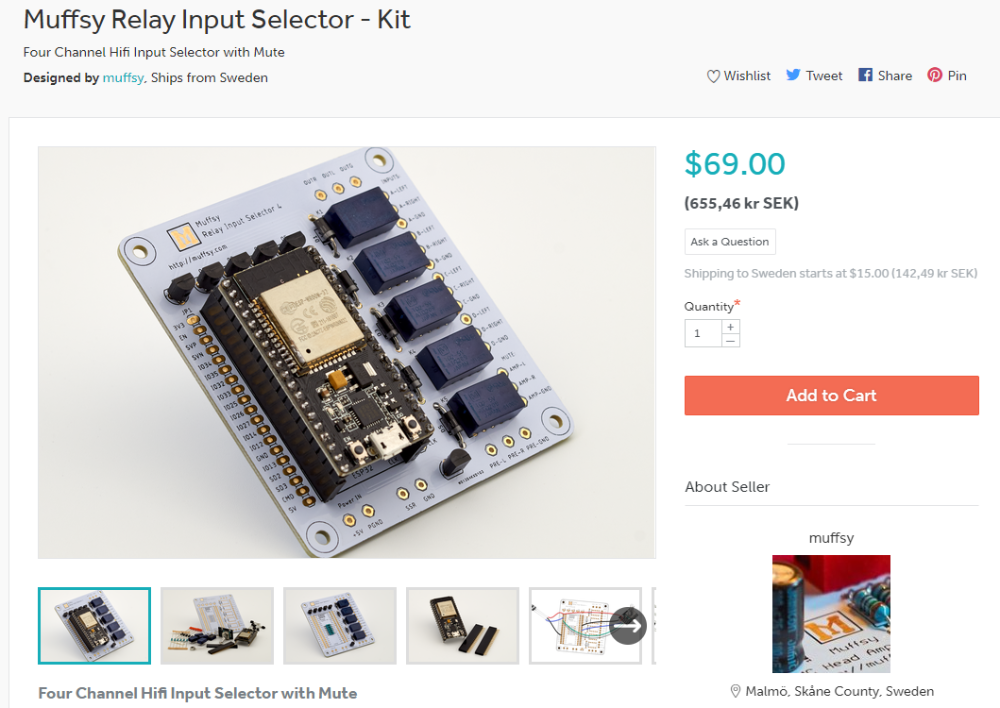
While there are lots of quality kits for preamplifiers, I have never really found a decent way of adding more inputs to a preamp. The existing ones are either of dubious quality, spec'ed like a spaceship, or both.
So I decided to make my own input selector. With relays. And an ESP-32 module! A year,...
Several people have been in touch lately with questions on how to modify the PCB into something it isn't right now. Popular requests are balanced inputs and/or balanced outputs, and DC servo on the outputs.
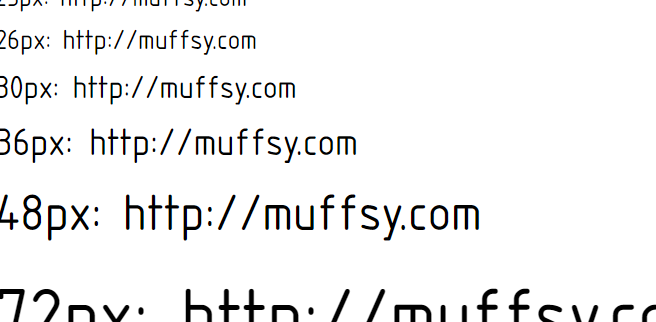
I just got a request from someone who wants to CNC a front panel for his Muffsy MC Head Amp, and he wanted to use the logo and the font that are on the printed circuit boards.
OSIFONT - The CAD Font
The font used on the PCB is the built-in vector font in Eagle, which is proprietary. The Eagle font is ...
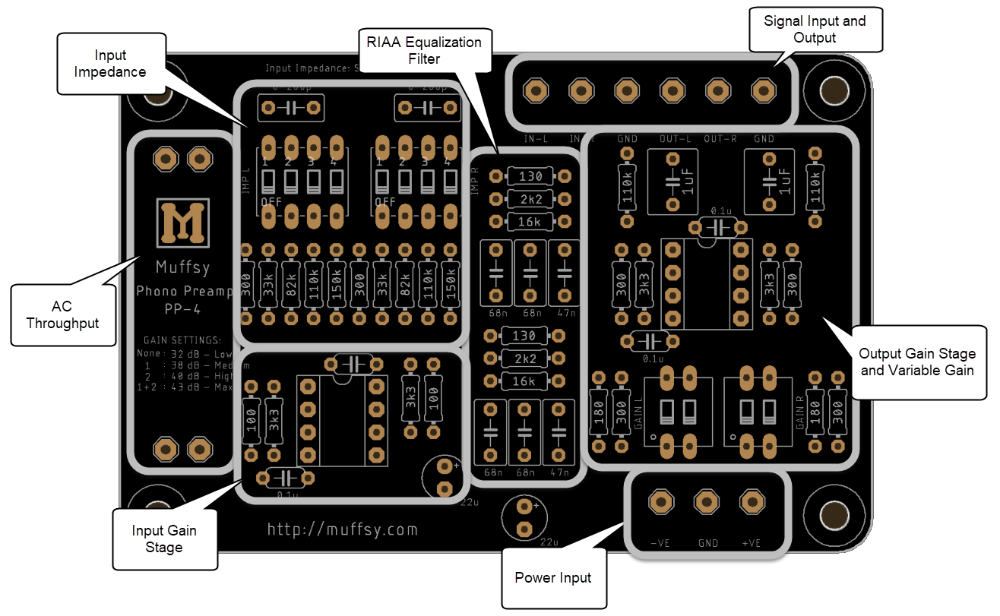
Behold the new Muffsy Phono Preamp!
It'll be available on Tindie, very soon. Actually, it is available: https://www.tindie.com/products/skrodahl/muffsy-phono-preamp-kit/
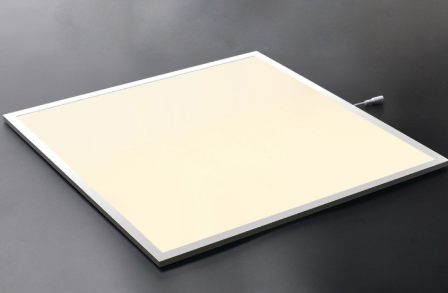
It's become evident that I need a better solution for photographing my projects. So I went out and bought some surprisingly cheap LED panels:
While I've been sharing a lot of my work on muffsy.com, I've never really clarified how my view is on people using my work (or derivates of it). This is now changing.
I've decided to release all of my content (barring a few exceptions) under the Creative Commons Attribution 4.0 International license...
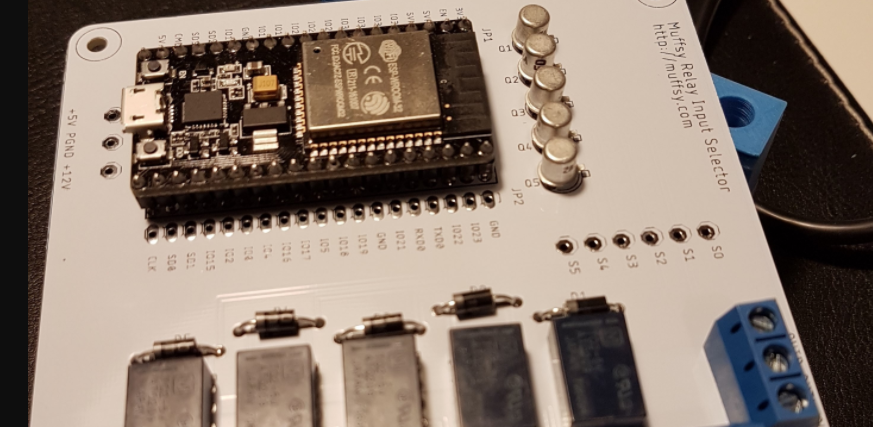
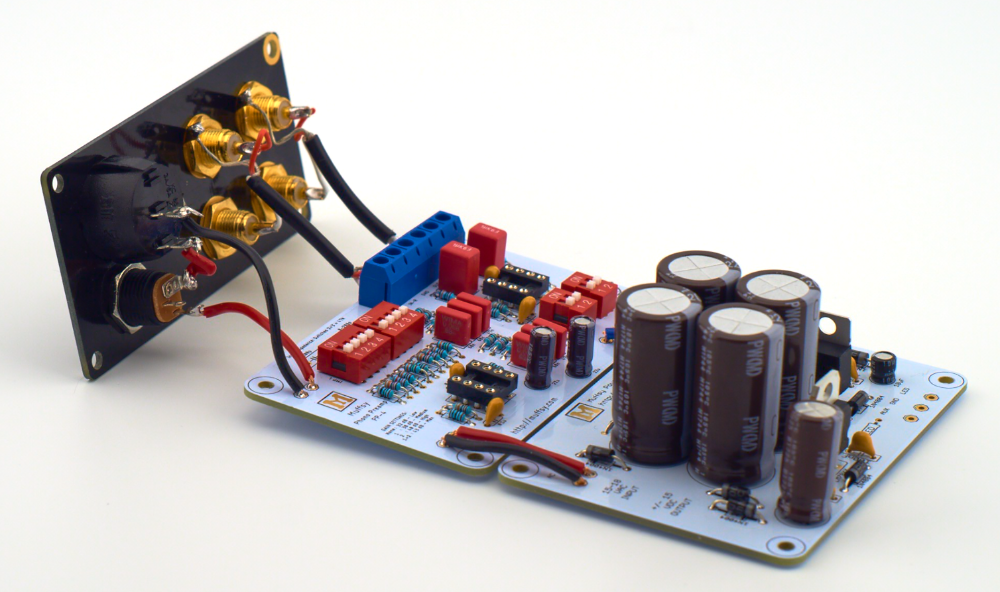
I'd really like a stereo input selector with relays, but those things are hard to find! (Apart from some of dubious quality on the *Bay)
Better make my own then. This one's got a custom footprint for an ESP32 devkit module, but it can also be controlled with a rotary switch.
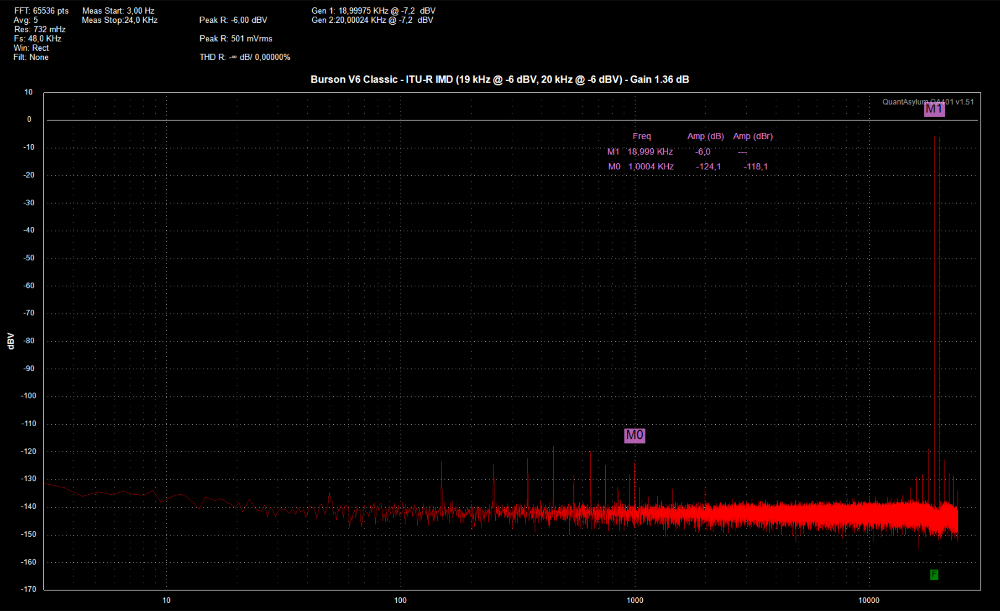
Check out this post for test setup and limitations.
ITU-R IMD is one way to measure intermodulation distortion. I am feeding the circuit with two test tones at -6 dBV, which will sum to 0 dBV. The test tones at 19 kHz and 20 kHz will produce a modulated signal at 1 kHz. The difference between the te...
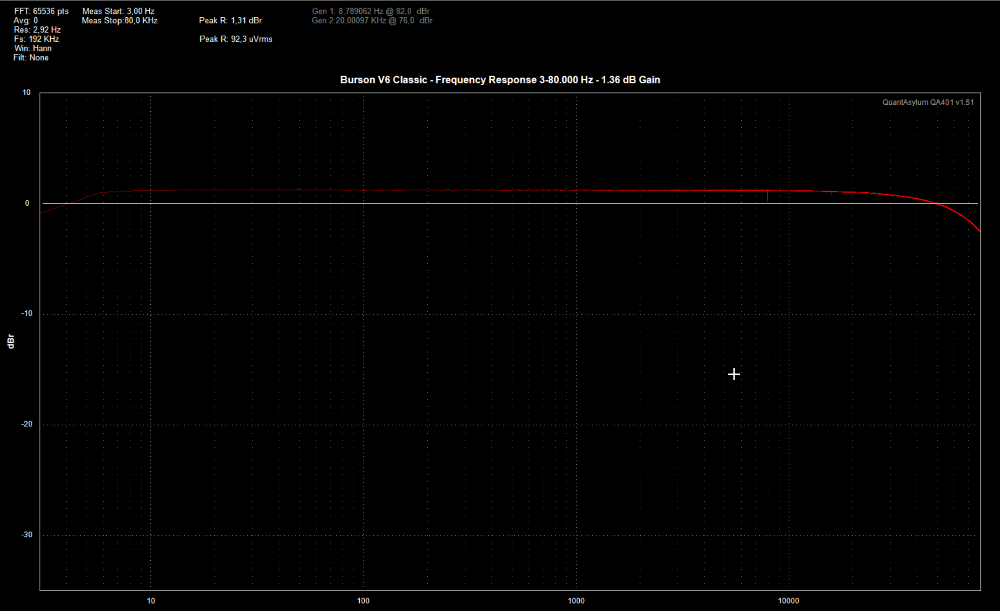
Following up on the THD measurement of the Burson V6 Classic (which also shows the test setup and limitations), here's its frequency response.
Categories
- Uncategorized
(2)
- News
(23)
- Instructions
(1)
- Modifications
(6)
- Measurements
(13)
- Pictures
(6)
- Side Projects
(7)
Tags
- homepage
- muffsy
- phonostage
- vinyl
- modifications
- psu
- HackadayPrize
- noise floor
- thd
- riaa
- backpanel
- tindie
- pictures
- ivo
- smd
- reviews
- kit
- muffsy clone
- integrated
- dual
- turntable
- components
- capacitors
- nichicon
- power supply
- screws
- op amp
- njm2068
- simulatioin
- pcb
- gerber
- audiokarma
- cnc
- MYOM
- simulation
- ground
- hum
- shielding
- snr
- noise
- powersupply
- moving coil
- mc
- head amp
- back panel
- hackaday
- launch
- LED-Tester
- LED
- PCB
- Schematics
- constant current
- the BSTRD
- tube
- valve
- preamp
- eagle
- bstrd
- sideproject
- stamp
- packaging
- inverse riaa
- hifisonix
- power
- step-down
- transistor tester
- smd stencil
- measurements
- youtube
- rip
- headphones
- headphone amp
- koss
- portapro
- sennheiser
- qa401
- burson
- discrete op amp
- audio analyzer
- frequency response
- relay
- open source
- input selector
- esp32
- iot
- website
- lightbox
- diy
- photo
- mia lights
- photogeeks11
- pp-4
- logo
- font
- osifont
- png
- muffsyfont
- layout
- relay input selector
- tq-2
- panasonic
- myom
- irm
- meanwell
- 5V
- 5VDC
- 5 volts
- autodesk eagle
- spice
- ltspice
- riaa equalization