Ivo, who created the SMD version of the Muffsy Phono Preamp, has sent me a lot of nice pictures and a description of his project.

Here's what Ivo says about his project:
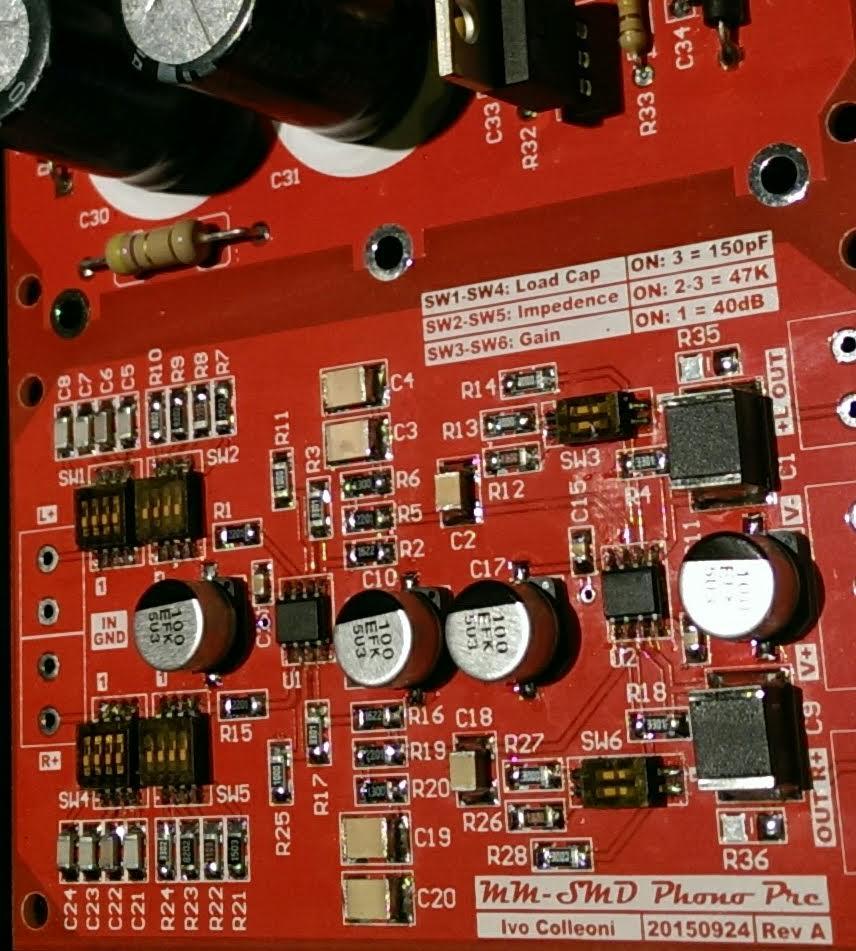
I wanted to build a compact turntable preamp with some adjusting capabilities such as gain, impedance and input capacitance . So I found the Muffsy PP-3 as a very good and valid starting point for my build project.
At the same time i wanted to do something rare in a audiophile world and SMD seems to be rare. Using SMD components allow to reduce the size of the board. The smaller the size of the components and PCB, the lower the possible external interferences. So I decided to try to build this project with SMD components.

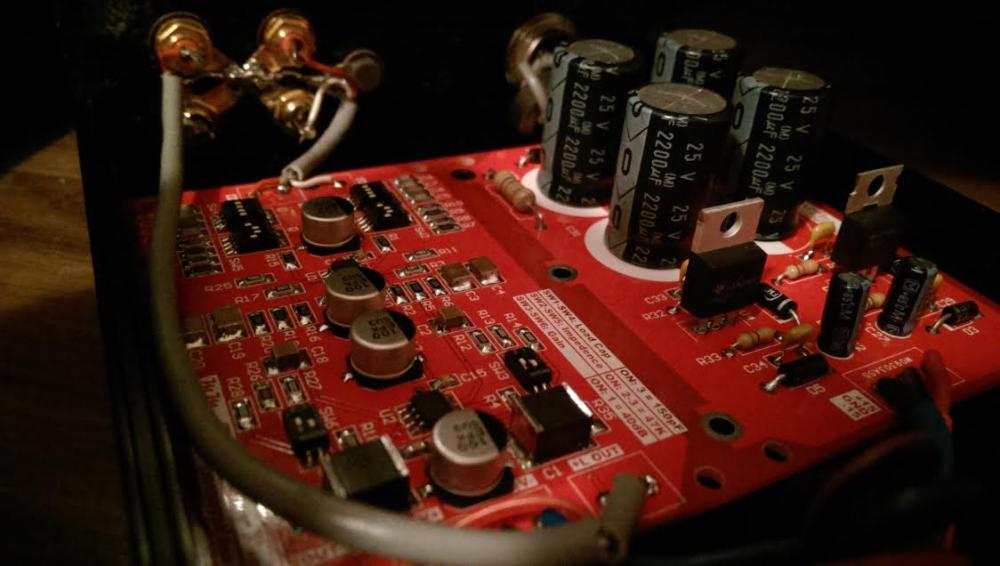
It was very hard selecting the components, and the cost increase for a single board is high. For my PP I chose all resistors in 1206 package and 1% tolerance, and all the capacitors in 1206 package and 5% for the capacitors (excluding the RIAA and the output capacitors).
The RIAA eq network capacitors are high quality KEMET PPS capacitors (case 1210 and 1812 5%) and the output capacitors are PET capacitors from WIMA (10% tolerance, case 2824). I also put some attention to keep the signal path as short as possible and equal length between left and right channels.
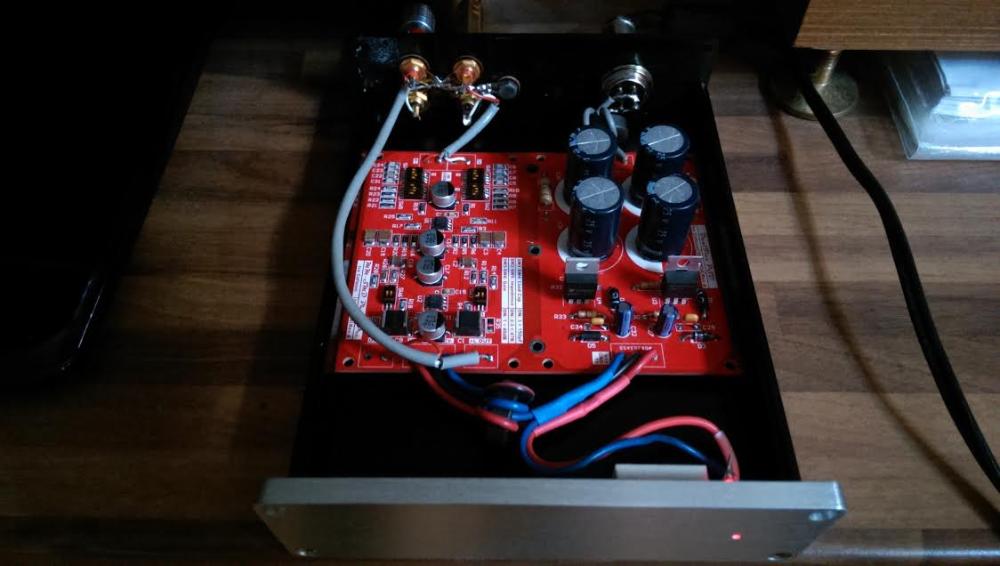
I decided to build the PP and the PSU on the same PCB, but leaving them disconnected and connect the two circuits by wire. The boards can then be separated, if needed.The final dimensions for the PCB (PP + PSU) is about 12cm x 9cm and it fits exactly in a B1304 enclosure.
- Power ripple/noise: 12mVpp, 0.166mV RMS
- Output noise with shorted input: 7.12mVpp, 0.173mV RMS

That's the project in Ivo's own words. He has been very focused, with a clear design goal from the start. The end result has become very nice because of this.
I particularly like how he mounted the LED in the front panel. This nice effect came from drilling about 80% through with a 5mm drill, and finishing with a 2mm drill. The remaining hole was filled with hot glue and polished.
It was great to be able to support Ivo in this project, and I am very happy for him that everything worked out as he wanted it to.